Are you ready to make a meal that’s tasty, nutritious, and easy to prepare? Batch Cooking Black Bean and Quinoa Chili Delight is a fantastic way to enjoy delicious, hearty chili while saving time and effort. Whether you're busy with work or family, this recipe fits your needs. You’ll learn how to gather fresh ingredients and transform them into a dish that will warm your soul. Let’s dive in!
Why I Love This Recipe
- Healthy and Nutritious: This chili is packed with protein and fiber from the black beans and quinoa, making it a wholesome meal option.
- Spicy Kick: The combination of chili powder and smoked paprika gives this dish a delightful spicy flavor that warms you up.
- Easy to Prepare: With simple steps and minimal prep time, this recipe is perfect for busy weeknights.
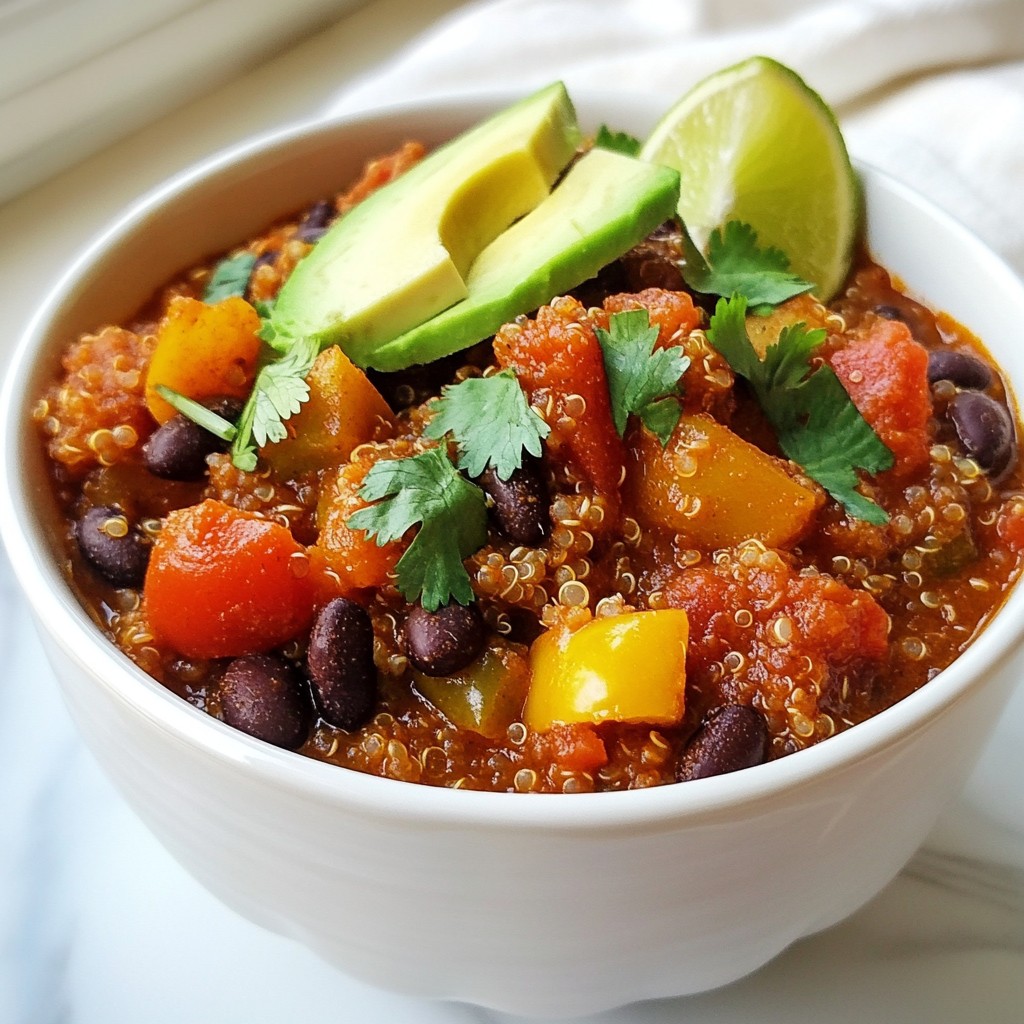
- Customizable Toppings: You can easily personalize your bowl with toppings like avocado, cilantro, or cheese to suit your taste.
Ingredients
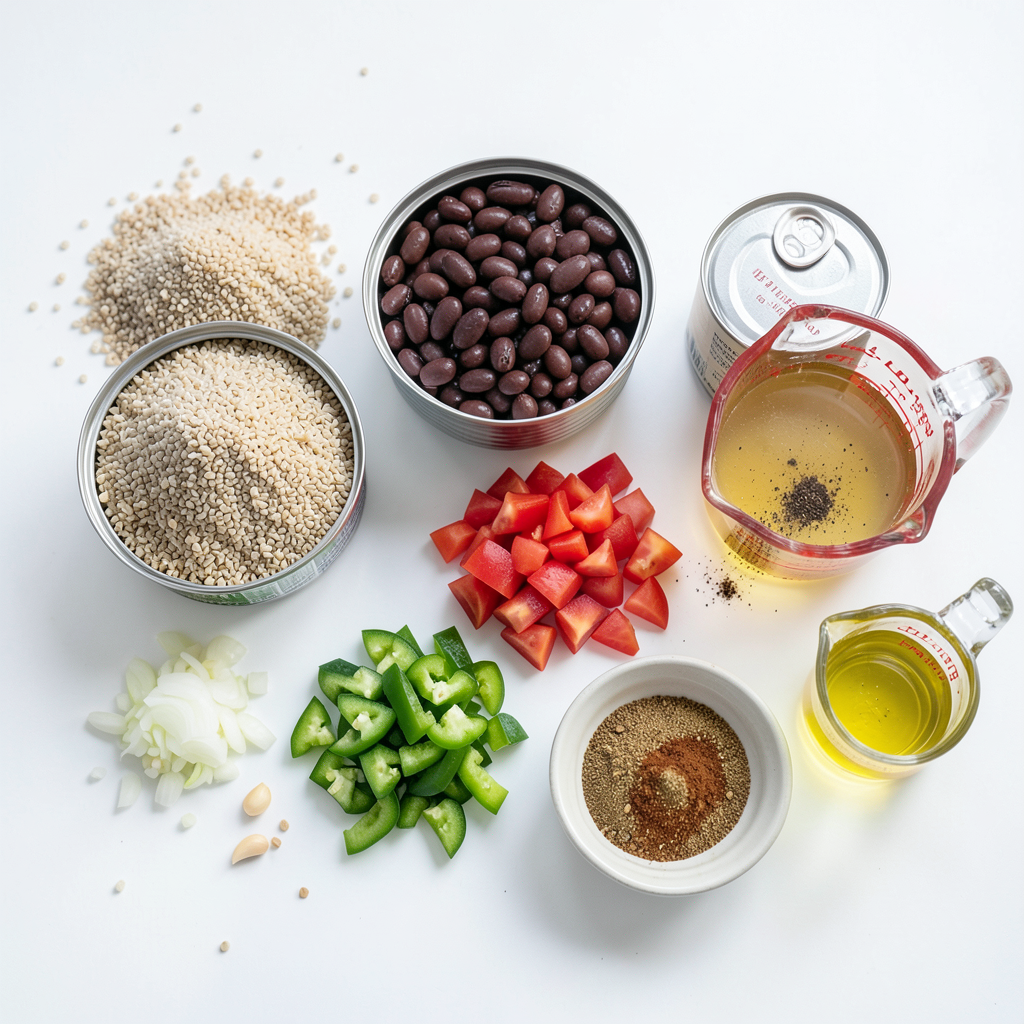
Full list of ingredients
- 1 cup quinoa, rinsed and drained
- 2 cans (15 oz each) black beans, rinsed and drained
- 1 can (28 oz) diced tomatoes
- 1 medium onion, finely chopped
- 3 cloves garlic, minced
- 1 green bell pepper, diced
- 1 red bell pepper, diced
- 2 cups vegetable broth
- 1 tablespoon olive oil
- 2 tablespoons chili powder
- 1 teaspoon cumin
- 1 teaspoon smoked paprika
- Salt and pepper to taste
- Optional toppings: avocado slices, cilantro, lime wedges, or shredded cheese
Quality tips for fresh ingredients
Choose organic black beans for better taste and health. Fresh veggies add crunch and flavor. Opt for bright bell peppers. Look for ripe tomatoes with smooth skin. Always check the expiration dates on canned goods. Fresh garlic should feel firm and not sprout. Buy quinoa that looks shiny and clean for the best results.
Optional toppings for serving
Top your chili with creamy avocado slices for richness. Fresh cilantro adds a pop of flavor. A squeeze of lime brightens the dish. For those who love cheese, sprinkle some shredded cheese on top. These toppings make each bowl a delightful treat.
Step-by-Step Instructions
Preparation steps overview
To make this chili, gather your ingredients first. You will need quinoa, black beans, tomatoes, onion, garlic, bell peppers, vegetable broth, olive oil, and spices. Having everything ready makes cooking smooth and fun.
Detailed cooking process
1. Start by heating olive oil in a large pot over medium heat.
2. Add your chopped onion and minced garlic. Cook them for about 5 minutes. You want the onion to be clear, not brown.
3. Next, toss in the diced green and red bell peppers. Cook for another 5 minutes until they soften.
4. Now, sprinkle in the chili powder, cumin, and smoked paprika. Stir well for one minute. This step wakes up the spices!
5. Pour in the diced tomatoes, black beans, quinoa, and vegetable broth. Mix everything nicely.
6. Bring the chili to a boil. Once it boils, turn down the heat to low. Cover the pot and let it simmer for about 30 to 35 minutes. Stir occasionally. If it looks too thick, add more broth.
7. Before you serve, taste your chili. Add salt and pepper as needed for flavor.
Final seasoning and serving tips
When you serve your chili, use deep bowls. Add fun toppings like avocado slices, fresh cilantro, lime wedges, or shredded cheese. These extras make every bite delicious!
Tips & Tricks
Batch cooking techniques for meal prep
Batch cooking is a great way to save time. Start by prepping all your ingredients first. Chop the onions, garlic, and peppers. Rinse your quinoa and beans. When everything is ready, cooking will be quick and easy. You can make a big pot of chili in under an hour. Store the chili in containers for easy meals later. This method helps you eat healthy all week.
How to adjust the spice level
To make your chili spicier, add more chili powder or diced jalapeños. If you like it milder, skip the jalapeños. You can also add a dash of hot sauce when serving. Taste the chili while it simmers to find your perfect spice level. Remember, you can always add more spice, but it is hard to take it out.
Recommendations for perfecting texture and flavor
For a thick and hearty chili, let it simmer longer. A good simmer helps flavors meld together. Stir the chili every so often to keep it from sticking. If it's too thick, add more vegetable broth to reach your desired consistency. For a richer flavor, try adding a splash of lime juice before serving. This brightens the dish and enhances the taste.
Pro Tips
- Use Fresh Ingredients: Fresh vegetables enhance the flavor of the chili and provide better texture. Always opt for fresh if possible!
- Adjust Spice Levels: Customize the heat by adding more chili powder or incorporating fresh jalapeños for an extra kick.
- Let It Rest: Allowing the chili to sit for a few hours or overnight in the refrigerator lets the flavors meld beautifully, making it even tastier when reheated.
- Experiment with Toppings: Try different toppings like Greek yogurt, crushed tortilla chips, or a dollop of sour cream for added creaminess and crunch.
Variations
Substitutions for dietary preferences
You can easily change this recipe to fit your diet. For a gluten-free option, ensure your vegetable broth is gluten-free. If you want a vegan chili, skip the cheese and use plant-based toppings. You can also use different beans. White beans or kidney beans work well too.
Ingredient additions for extra nutrition
Want to boost your chili’s nutrition? Add some chopped kale or spinach during cooking. They wilt down nicely and add vitamins. You can also toss in some corn for sweetness and crunch. Chopped carrots or zucchini can add fiber and flavor.
Regional flavor variations
You can spice up your chili with regional twists. For a Mexican flair, add corn and top with queso fresco. If you like a smoky taste, add chipotle peppers in adobo sauce. For a Caribbean vibe, toss in some coconut milk and fresh ginger. Each change brings a new taste to enjoy!
Storage Info
Best methods for storing leftovers
Once your black bean and quinoa chili cools, store it in airtight containers. Glass containers work best. You can easily see what’s inside. Leave some space at the top, as the chili may expand when frozen. If you have extra toppings, keep them in a separate container. This keeps them fresh.
Reheating instructions for optimal flavor
To reheat your chili, use a pot over medium heat. Stir often to heat evenly. You can also use the microwave. Place the chili in a microwave-safe bowl and cover it loosely. Heat in short bursts, stirring in between. Add a splash of vegetable broth if the chili seems thick. This helps bring back its creamy texture.
Freezing tips for long-term storage
For long-term storage, freeze the chili in portions. Use freezer bags or containers. Make sure to label each bag with the date. Flat bags save space in the freezer. Thaw overnight in the fridge before reheating. This keeps the flavor fresh and tasty when you’re ready to enjoy it again.
FAQs
Can I make this chili in a slow cooker?
Yes, you can make this chili in a slow cooker. Simply sauté the onion and garlic in a pan. Then, add all the ingredients to the slow cooker. Stir well and set it on low for 6-8 hours or high for 3-4 hours. This method infuses the flavors deeply and makes it super easy.
How long does the chili last in the fridge?
The chili lasts about 4-5 days in the fridge. Store it in an airtight container to keep it fresh. When you’re ready to eat, just reheat it on the stove or in the microwave.
What can I serve with Black Bean and Quinoa Chili?
You can serve this chili with various sides. Here are some great options:
- Cornbread
- Rice
- Tortilla chips
- A fresh green salad
- Avocado slices or guacamole
Feel free to mix and match to find your favorite combo!
This blog post covered how to make a tasty Black Bean and Quinoa Chili. We looked at all the ingredients needed, ways to choose fresh ones, and optional toppings. Then, I shared step-by-step instructions for cooking. We added helpful tips for meal prep and ways to adjust spice levels. I also suggested ingredient variations and storage tips for leftovers.
In conclusion, making this chili is simple and rewarding. Enjoy your cooking and sharing this meal with loved ones!