Batch cooking can transform your weeknight meals, and today, I’m excited to share a tasty recipe for Creamy Coconut Chickpea Curry. With simple ingredients like chickpeas, coconut milk, and spices, this dish is not just delicious but also easy to prepare in large batches. Whether you want a comforting dinner or meal prep for the week, this curry has you covered. Let’s get cooking!
Why I Love This Recipe
- Easy to Prepare: This curry comes together quickly, making it perfect for busy weeknights or meal prep sessions.
- Nutritious Ingredients: Packed with protein from chickpeas and vitamins from spinach, this dish is not only delicious but also healthy.
- Versatile Flavor: The combination of spices creates a creamy, aromatic flavor profile that can be adjusted to suit your taste.
- Batch Cooking Friendly: This recipe is ideal for batch cooking, allowing you to enjoy leftovers throughout the week.
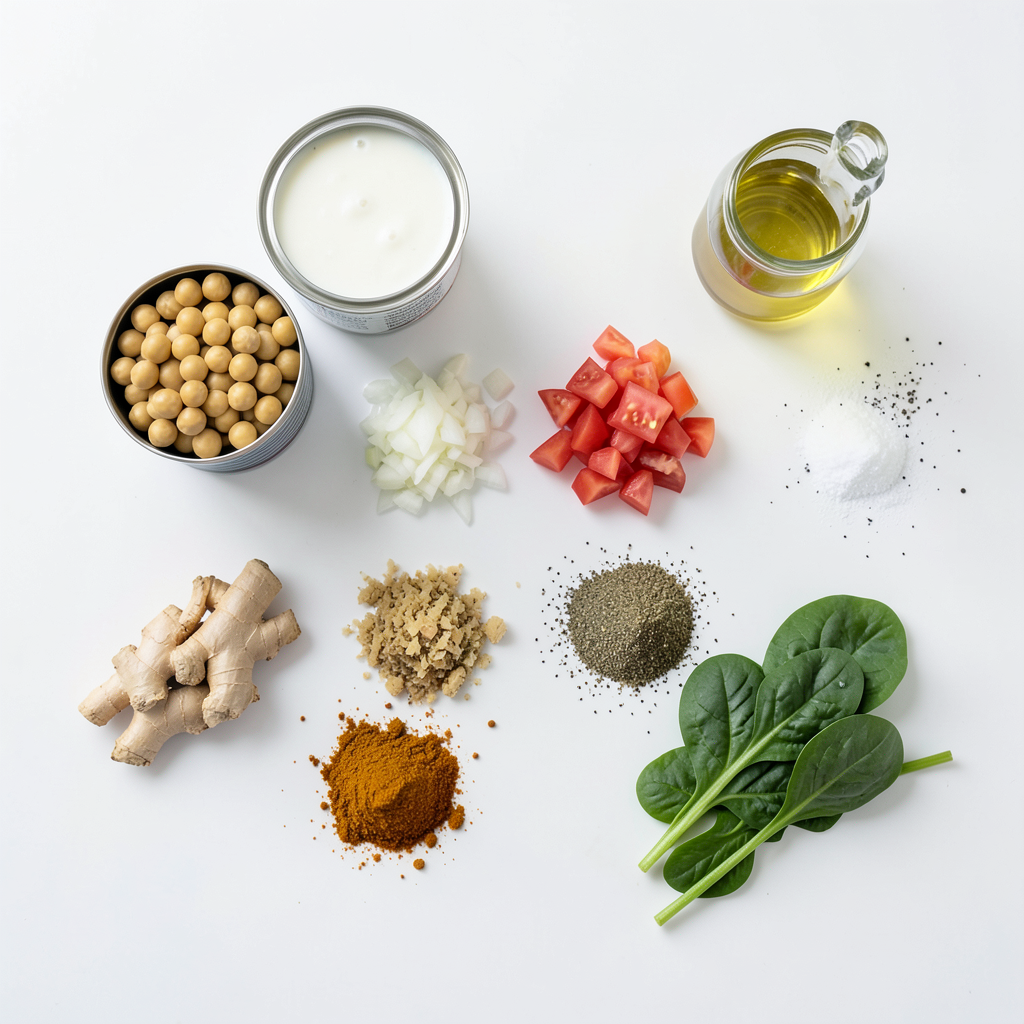
Ingredients
Main Ingredients
- 2 cans (15 oz each) chickpeas, rinsed and drained
- 1 can (13.5 oz) coconut milk
- 1 large onion, diced
- 3 cloves garlic, minced
- 1-inch piece ginger, grated
- 2 medium tomatoes, diced
- 2 cups spinach (fresh or frozen)
The chickpeas provide protein and fiber. Coconut milk adds creaminess and a tropical taste. Onions, garlic, and ginger form a flavor base that makes the dish aromatic. The tomatoes bring acidity and brightness to the curry. Fresh spinach adds color and nutrition.
Spices and Seasonings
- 1 tablespoon curry powder
- 1 teaspoon ground cumin
- 1 teaspoon turmeric
- 1 teaspoon chili powder (adjust to taste)
The spices are key to making this dish rich and flavorful. Curry powder adds warmth and depth. Ground cumin gives it an earthy note. Turmeric not only colors the dish but also adds health benefits. Chili powder brings heat; adjust it to your liking.
Enhancements
- 2 tablespoons olive oil
- Fresh cilantro for garnish (optional)
- Cooked rice or quinoa, for serving
Olive oil is great for sautéing and adds a smooth texture. Fresh cilantro brightens the dish and adds a fresh taste. Serve the curry over rice or quinoa, which makes it hearty and filling. This meal is not just tasty; it's also satisfying and easy to enjoy!
Step-by-Step Instructions
Initial Preparation
- Heating the Olive Oil
Start by heating 2 tablespoons of olive oil in a large pot over medium heat. This oil gives flavor and helps cook the onion.
- Sautéing Onion, Garlic, and Ginger
Add 1 large diced onion to the pot. Stir it for about 5 minutes until it turns translucent. Then, mix in 3 minced garlic cloves and 1-inch grated ginger. Cook for 1-2 minutes until you smell the spices.
Building the Curry
- Cooking the Tomatoes
Next, add 2 diced medium tomatoes to the pot. Stir them in and let them cook for 3-4 minutes. The tomatoes should soften and release their juices.
- Adding Spices and Toasting
Now, sprinkle in 1 tablespoon of curry powder, 1 teaspoon of ground cumin, 1 teaspoon of turmeric, and 1 teaspoon of chili powder. Stir everything well. Let the spices toast for about a minute. This step brings out their rich flavors.
Final Steps
- Mixing in Coconut Milk and Chickpeas
Pour in 1 can of coconut milk and add 2 cans of rinsed and drained chickpeas. Stir to combine. Ensure all the chickpeas are covered in that creamy goodness.
- Including Spinach and Seasoning
Bring the mixture to a gentle simmer. Cover the pot and let it cook for 15 minutes, stirring occasionally. After that, add 2 cups of spinach. Cook for 5 more minutes until the spinach wilts. Season with salt and pepper to taste.
Tips & Tricks
Perfecting the Flavor
Adjusting Spice Levels Start with the base spices. Curry powder adds warmth. Add chili powder to make it spicy. Taste as you go. If it's too spicy, add more coconut milk to cool it down.
Balancing Sweet and Savory Coconut milk brings sweetness. You can add a pinch of sugar if needed. Taste the dish with rice or quinoa to check balance. Adjust salt and pepper to fit your taste.
Batch Cooking Techniques
Cook and Store Make a large batch for easy meals. After cooking, let the curry cool. Use airtight containers for storage. It can last in the fridge for up to five days.
Reheating Tips To reheat, use a pot over low heat. Stir often to avoid sticking. You can also use a microwave. Heat in short bursts, stirring in between.
Presentation Ideas
Serving Suggestions Serve the curry over rice or quinoa in deep bowls. This adds color and texture to your meal. You can also pair it with naan bread for a fun twist.
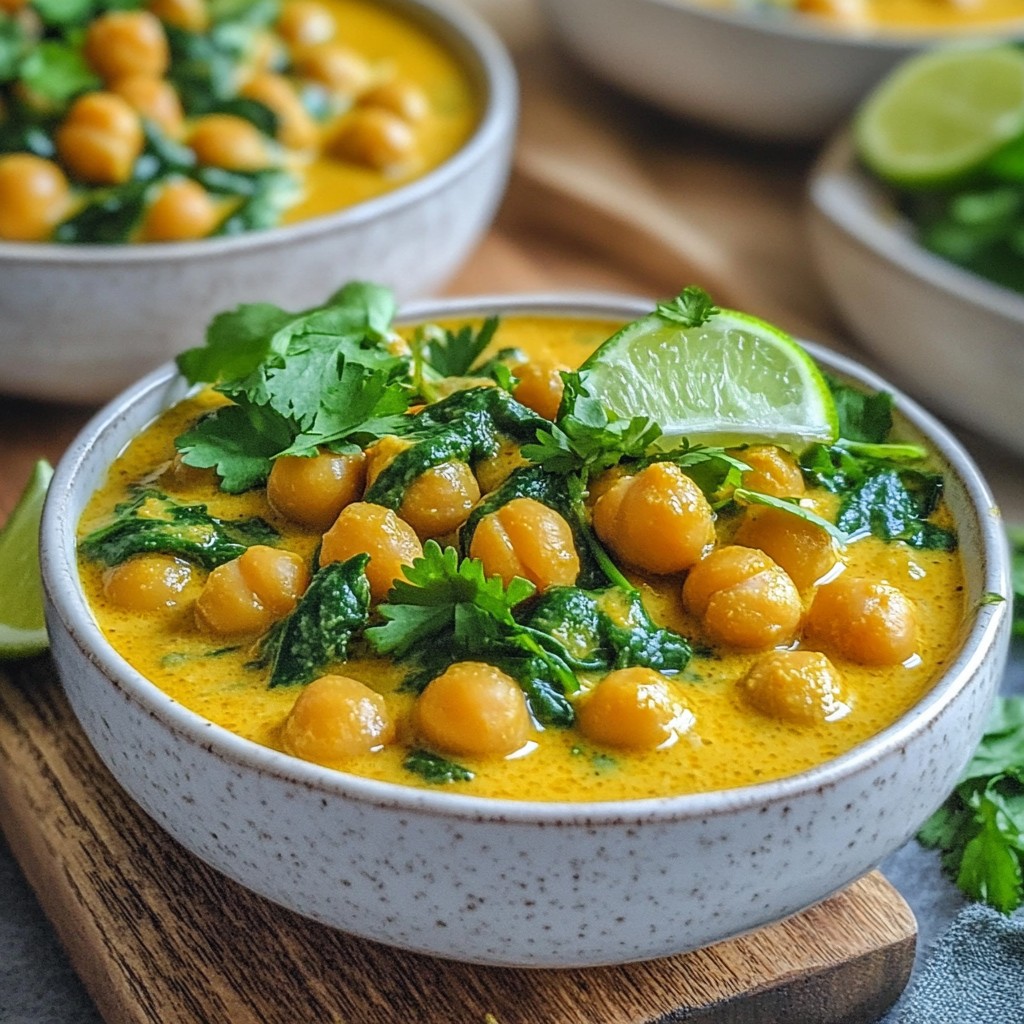
Garnishing for Visual Appeal Fresh cilantro adds a pop of green. Squeeze lime over the top for brightness. A wedge of lime can also enhance the flavor. Enjoy the beautiful and tasty dish!
Pro Tips
- Use Fresh Spices: Freshly ground spices can elevate the flavor of your curry. Consider grinding your cumin and turmeric for a more aromatic experience.
- Adjust the Heat: If you prefer a spicier curry, add chopped fresh chilies or a dash of cayenne pepper along with the other spices.
- Add Veggies: Feel free to toss in additional vegetables like bell peppers, carrots, or peas for added nutrition and color.
- Make It Ahead: This curry tastes even better the next day! Prepare in advance and let the flavors meld in the fridge overnight.
Variations
Alternative Ingredients
- Different Legumes
You can swap chickpeas for other beans. Black beans or lentils work well. They add new tastes and textures. Each legume brings its own charm. Try red lentils for a quick cook time.
- Substituting Coconut Milk
If you want less fat, use low-fat coconut milk. Almond milk is a lighter choice too. You can even blend cashews with water for a creamy option. Each choice changes the flavor a bit.
Flavor Twists
- Adding Other Vegetables
Want to boost nutrition? Toss in carrots or bell peppers. Zucchini or peas are tasty options too. These veggies add color and crunch. They also make the dish more filling.
- Using Different Spices
Feel free to get creative with spices. Add garam masala for warmth. A pinch of cinnamon or nutmeg can add depth. Experimenting lets you make a unique dish every time.
Dietary Adjustments
- Vegan and Gluten-Free Modifications
This dish is already vegan and gluten-free. Use gluten-free grains like quinoa for serving. You can enjoy this meal without any worries about dietary needs.
- Low-Calorie Version
To make it lighter, reduce the coconut milk. You can use veggie broth instead. Cut down on oil as well. These swaps keep the flavor while lowering calories.
Storage Info
Refrigeration Guidelines
- You can keep the curry in the fridge for up to 4 days.
- Store it in an airtight container to keep it fresh.
Freezing Instructions
- Divide the curry into serving sizes before freezing.
- Use freezer-safe bags or containers to store portions.
- To thaw, place the curry in the fridge overnight.
- Reheat in a pot on low heat or in the microwave.
Containers to Use
- Glass or BPA-free plastic containers work best.
- Avoid using metal containers for freezing.
- To avoid freezer burn, squeeze out air from bags.
FAQs
How to Make Chickpea Curry Creamy?
To make your chickpea curry creamy, use coconut milk. It adds rich flavor and texture. Heat the coconut milk gently with the spices. This helps blend the flavors well. You can also blend some chickpeas before adding them. This thickens the dish and enhances creaminess.
Can I prepare this recipe ahead of time?
Yes, you can prepare this curry ahead of time. Batch cooking works well with this dish. Make the curry and let it cool. Then, store it in airtight containers. It stays fresh in the fridge for up to five days. You can also freeze it for longer storage. Just thaw it overnight before reheating.
What to serve with Creamy Coconut Chickpea Curry?
I recommend serving this curry with rice or quinoa. They soak up the sauce nicely. You can also add naan for a fun twist. A fresh salad or steamed veggies pair well too. Garnish with cilantro for a burst of flavor and color. Enjoy this delightful meal!
This blog post covered the key ingredients, steps, and tips for making creamy coconut chickpea curry. I explained how to enhance flavors and offered ideas for variations. You learned about storage and answers to common questions.
Cooking this curry is simple and rewarding. It works for many diets and tastes great. Enjoy experimenting with ingredients to make it your own. Your kitchen will become a cozy place filled with delicious scents and flavors.