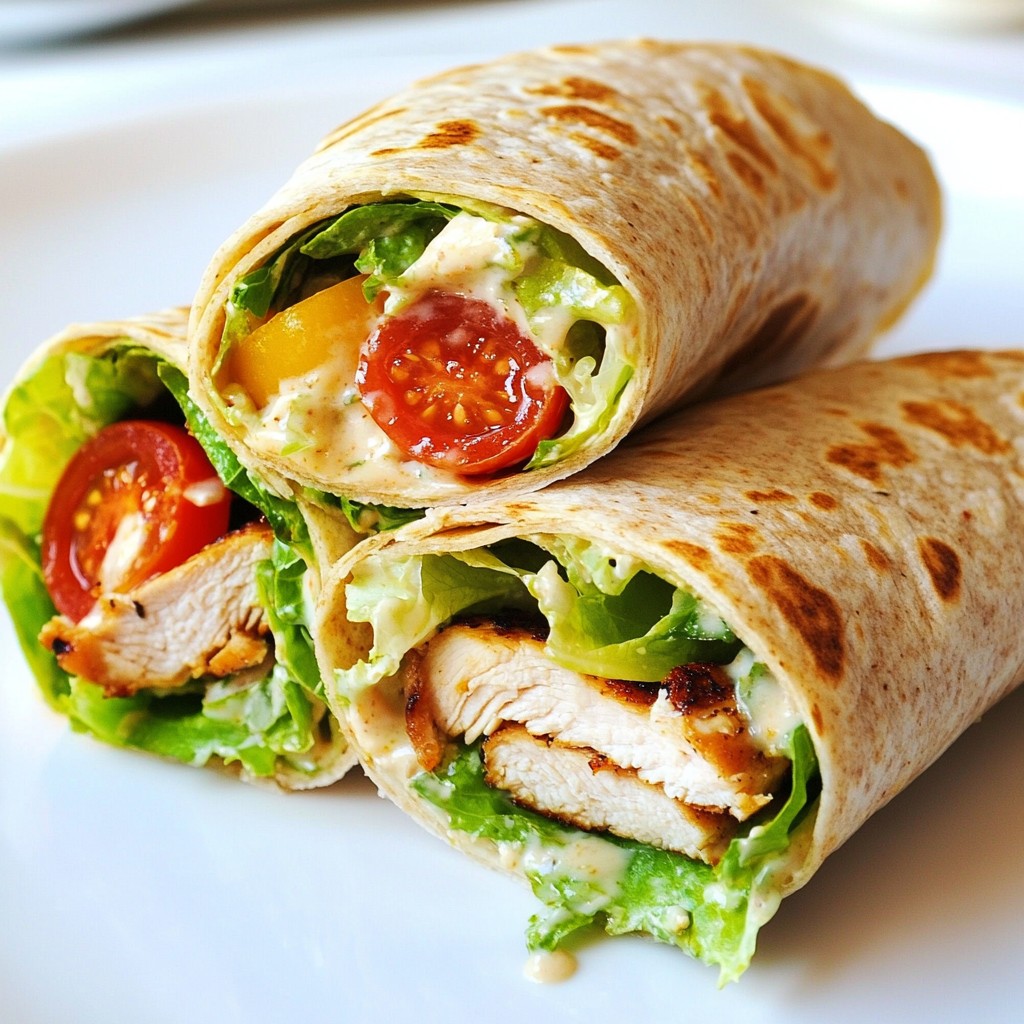
Are you ready to enjoy a tasty and healthy meal? My Grilled Chicken Caesar Wraps are the perfect choice! They are easy to make, full of flavor, and perfect for meal prep. You’ll learn how to create these wraps with simple ingredients and step-by-step instructions. Whether you're on the go or enjoying a fun meal at home, these wraps will delight your taste buds. Let's dive in!
Why I Love This Recipe
- Healthy Ingredients: This recipe uses whole wheat tortillas and lean grilled chicken, making it a nutritious option for meal prep.
- Quick and Easy: With a total time of just 30 minutes, it's perfect for busy weeknights or meal prepping for the week ahead.
- Customizable: You can easily add or substitute ingredients based on your preferences, whether it's different veggies or protein.
- Delicious Flavor: The creamy Greek yogurt Caesar dressing adds a tangy and rich flavor that elevates the dish.
Ingredients
Chicken and Wraps
For the base of these wraps, you need:
- 2 large chicken breasts
- 4 whole wheat tortillas
These items give your meal a healthy protein boost and a hearty wrap.
Vegetables and Toppings
Next, add fresh veggies and toppings. Gather:
- 2 cups romaine lettuce, chopped
- 1/2 cup cherry tomatoes, halved
- 1/4 cup shredded Parmesan cheese
These ingredients bring crunch and flavor to each bite.
Dressing Ingredients
Finally, we need to make a tasty dressing. You will need:
- 1/2 cup plain Greek yogurt
- 2 tablespoons lemon juice
- 1 tablespoon Dijon mustard
- 1 teaspoon garlic powder
- Salt and pepper to taste
- Olive oil for grilling
The dressing adds a creamy touch, making the wraps truly delightful.

Step-by-Step Instructions
Preparation of Chicken
To start, preheat your grill or grill pan to medium-high heat. This step is key to getting nice grill marks on your chicken. Take 2 large chicken breasts and season them with salt, pepper, and garlic powder. A little olive oil on both sides helps keep them juicy. Grill the chicken for 6-7 minutes on each side. Check the internal temperature; it should reach 165°F (75°C). Once done, let the chicken rest for a few minutes. This resting time keeps the juices in.
Making the Caesar Dressing
While your chicken rests, grab a bowl to make the dressing. Combine 1/2 cup of plain Greek yogurt with 2 tablespoons of lemon juice and 1 tablespoon of Dijon mustard. Add a pinch of salt and pepper to taste. Mix it all up until it's smooth and creamy. This dressing is healthy and packed with flavor. It adds a nice tang to the wraps.
Assembling the Wraps
Now, it’s time to put everything together! Take a whole wheat tortilla and lay it flat. Spread a layer of your creamy Caesar dressing right in the center. Next, add chopped romaine lettuce, sliced grilled chicken, and halved cherry tomatoes. Finish with a sprinkle of shredded Parmesan cheese. Fold in the sides of the tortilla and roll it tightly from the bottom up. Repeat this with the other tortillas and fillings.
Grilling Tips
For grilling, keep an eye on the heat. Too hot can burn your chicken, and too cool won't cook it well. Use a meat thermometer to check the chicken’s doneness. Let the grill do its work without flipping too much. This allows for a nice sear. If you have leftover chicken, it can be used in salads or sandwiches!
Tips & Tricks
Meal Prep Tips
To make your meal prep quick and easy, start by cooking extra chicken. This way, you can use it in other meals. Cut your chicken into strips right after grilling. This makes it easier to add to your wraps. Use whole wheat tortillas for a healthier option. You can make these wraps ahead of time and store them in the fridge. Just wrap them in parchment paper or foil for easy grab-and-go meals.
Presentation Suggestions
Cut the wraps in half for a pretty display. Place them on a colorful platter. Add some extra cherry tomatoes for color. You can also serve a small bowl of Caesar dressing on the side. This lets everyone dip their wraps. It adds a fun touch and makes them look fancy.
Grilling Techniques
Grilling your chicken perfectly is key. Preheat your grill or grill pan to medium-high heat. Season your chicken well with salt, pepper, and garlic powder. Drizzle olive oil on both sides before grilling. Grill for about 6-7 minutes on each side. Always check the internal temperature; it should reach 165°F (75°C). Let the chicken rest for a few minutes after grilling. This keeps it juicy and tender.
Pro Tips
- Marinate for More Flavor: For an extra burst of flavor, marinate the chicken breasts in the Caesar dressing for at least 30 minutes before grilling.
- Use a Meat Thermometer: Ensure your chicken is perfectly cooked by using a meat thermometer to check that the internal temperature has reached 165°F (75°C).
- Customize Your Wrap: Feel free to add other vegetables like bell peppers or cucumbers for added crunch and nutrition in your wraps.
- Storage Tips: Store wraps in an airtight container in the fridge for up to 4 days for easy grab-and-go lunches throughout the week.
Variations
Vegetarian Alternatives
You can swap chicken for grilled veggies. Try bell peppers, zucchini, or mushrooms. These add flavor and texture. For protein, use chickpeas or black beans. They give a nice crunch and healthy benefits. Use the same Caesar dressing with Greek yogurt for a creamy touch. It keeps the wrap light and fresh.
Gluten-Free Options
To make these wraps gluten-free, choose gluten-free tortillas. Many brands offer great taste and texture. You can also try lettuce wraps. Romaine leaves work well and add a nice crunch. For added flavor, marinate the chicken in lemon juice and garlic before grilling. It gives your meal a zesty boost.
Additional Flavor Enhancements
To enhance the flavor, add spices or herbs. A sprinkle of smoked paprika can add warmth. Fresh basil or cilantro gives a nice pop of flavor. You can also try adding avocado for creaminess. Toss in some olives or capers for a salty kick. Each small change can make your wrap unique and exciting.
Storage Info
How to Store
To keep your Grilled Chicken Caesar Wraps fresh, wrap each one tightly. Use parchment paper or foil for best results. Place the wraps in an airtight container. Store them in the fridge. They stay tasty for up to four days.
Reheating Instructions
When you’re ready to enjoy your wraps, take them out of the fridge. Unwrap them from the paper or foil. Heat a skillet over medium heat. Place the wrap in the skillet for about 2-3 minutes on each side. This warms the chicken and makes the tortilla soft again. You can also use a microwave. Heat it for 30-60 seconds. Just make sure to cover the wrap with a damp paper towel to keep it moist.
Best Practices for Meal Prep
When prepping, make your wraps in bulk. This saves time during the week. Use fresh ingredients for the best taste. Store the dressing separately if you can. This keeps the wraps crisp and not soggy. If you plan to freeze them, use freezer-safe bags. They can last up to three months. Just remember to label the bags with the date.
FAQs
What can I substitute for chicken?
You can use turkey or tofu in place of chicken. Both options work well. Turkey offers a lean protein, while tofu is a great vegetarian choice. You can also try roasted chickpeas for a fun twist.
How long do these wraps last in the fridge?
These wraps last about three days in the fridge. Store them in an airtight container to keep them fresh. The veggies may lose some crunch, but the taste remains great.
Can I freeze Grilled Chicken Caesar Wraps?
Yes, you can freeze them. Wrap each one tightly in foil or plastic wrap. They last up to three months in the freezer. Thaw them overnight in the fridge before enjoying.
What are some side dishes that pair well?
These wraps go great with a side salad or fresh fruit. You could serve them with carrot sticks or a light soup too. Each side adds color and flavor to your meal.
You learned how to make Grilled Chicken Caesar Wraps step by step. We covered the key ingredients, including chicken and veggies, and how to dress them. I shared tips for prepping, grilling, and meal presentation. Plus, you discovered tasty variations and storage tips.
These wraps are easy, fun, and great for any meal. Enjoy making them and feel free to experiment with flavors and ingredients. Your kitchen adventure awaits!